I was so excited when my "boss," Tricia, over at Lil Angels Hankies told me I could do occasional tutorials on keepsakes people could make themselves! I've got so many ideas I'm really excited about! Anyway, without further ado, I present the no-sew DIY Screenprinted Blankie!
Wait...Just to let you know, I will always try to keep the keepsake costs under $20. Okay, done.
You will need:
...a husband who isn't OCD and throws away receipts. ...off to dumpster dive.
*AHEM*
You will need:
Modge Podge $2.99 for small bottle at AC Moore
2 Sponge Brushes $.10 (ACM)
Wooden Embroidery Hoop $1.69 for any size at ACM, so I got large.
Fabric Paint $3.79, but the bottle I got was WAY bigger than I needed. (ACM)
Paper and Pen (or print something out! Much easier...)
Scissors (which I forgot to add to the picture here.)
Ladies Hose $1.50 at Family Dollar, and I got size Q so I'd have more material.
Fleece $4.80/yard at Hancock. I suggest getting something on the dollar table to save much more. (I only got one yard to make a baby blanket, but 2 yards would be a 3x5 feet blanket, and 4 yards would get you a 6 foot x 5 foot blanket.)
SO, you're spending about $19.65 plus tax if you go with two yards of fabric.
Step 1: Draw whatever you want to print on your blankie. OR print it out in black and white. I chose to do my son's monogram because I think they're super-classy and cute. :)
Step 2: Cut it out! There's not much I can say to help you out here. :) Use scissors.
Step 3: Grab those hose and cut 'em up! Just slice straight down one leg so it opens nicely.
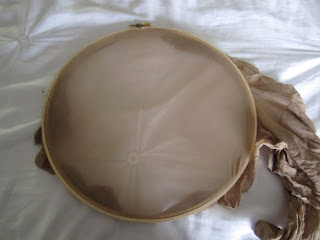
Step 4: Stretch the hose over the hoop. WOW, did this take forever (ie: 2 whole minutes which is painful in my mind). Keep stretching and you'll get it.
Step 5: Cut off the excess nylon that's hanging off the edge.
Step 6: Put your paper on the nylon.
Step 7: I actually had to use tape to get it to stay. This worked fine, which leads me to believe a sticker would work pretty well instead of paper if you wanted to do that.
Step 8: Use your foam brush to apply Modge Podge EVERYWHERE besides where the paper is... NOTE: DON'T paint the Modge Podge on the nylon where it will hit the hoop. That will make the nylon stick to the hoop, which I figured out much too late. Oh well. I'll buy a new hoop.
Step 9: Figure out just how long this is going to take and lose patience.
I actually pulled the paper up after I finished outlining it and just finished the rest of the nylon.
Although I was a nervous wreck this wouldn't work, it was totally fine. I kept obsessing over "thin" areas, but it all worked very well. Let your nylon dry for about five hours.
Step 10: Cut your fabric so that you have TWO pieces that are the same size.
Step 11: Cut slices about 3-4 inches into the fabric, all the way around. I lost interest in measuring about a minute into it, so I just guessed. You'll be fine.
Here's what it looks like.
This is what the nylon looked like after about an hour.
Step 12: Take the slices and tie them together, bringing together both the top and bottom pieces of fabric. Go all the way around, but leave a foot of space untied for later.
This is what the nylon looked like about five hours after... It's FINALLY finished when it's all clear.
Step 13: Lay your blankie out on the floor... Or if you're fancy, on your scrapbooking table.
Step 14: Stuff a bag into the hole you left earlier. This will keep the paint from leaking through. I doubt it actually would seep through the thick fleece, but it did on my test cotton, so I decided not to risk it.
Step 15: (FIRST, which is where I messed up, unhook your hoop and flip your nylon over so you can lay it flat on the fabric. You see, the way I did it, my design was basically held about 1/2 inch off the fabric by the hoop. It worked fine, but I imagine it's easier the other way.)
Lay your hoop on the fabric where you want to paint the design. Yes, mine already has paint on it. I had to test it before I did it on the fleece. Just ignore the paint.
Step 16: Squeeze the paint onto your design.
I just basically drew right over the design.
Step 17: Drag a sponge brush over the whole design many times, pushing down to make sure the paint goes through the nylon. Don't DRAG the nylon, or it will paint more than you want. Just go slowly and apply medium pressure.
Thank my husband for getting home so he could take pictures of this part.
Step 18: Pick up the hoop! Let the fabric dry according to the paint directions. Mine needs to dry about 4 hours. So, in about two hours, my daughter will enjoy her little brother's keepsake blankie!
Please, if you do try this, share it on the Lil Angels Hankies Facebook page here.
And if you have any questions, just comment below! I hope you enjoy!
Love,
Annie (Carpenter's Mom!)


I like it! Seems pretty "easy" too. Thanks!
ReplyDeleteIt was pretty easy, actually. It just took a while. Good Saturday project, for sure! And the long part--the screen--once it's done, you can reuse it over and over!
ReplyDelete